back to basics . . .

Sometimes, you just want to strip things back to the basics.  Unfortunately, life really doesn’t seem to work that way, instead only getting more complicated with time.  Growing old makes one long for simpler times, as cliche as this may be.

Lately, I have felt as though I am constantly in ‘fight or flight’ mode, trapped by circumstances beyond my control and to which I can only react.  I have been trying to make the best of it and to focus on what I can do, but it is hard not to worry and fret about the things beyond my reach or influence.  Hence, back to basics this weekend for me, and focusing my energy on even mundane things that keep me centered.  I need to fight my tendency to look at things from too many angles and just pare things down.

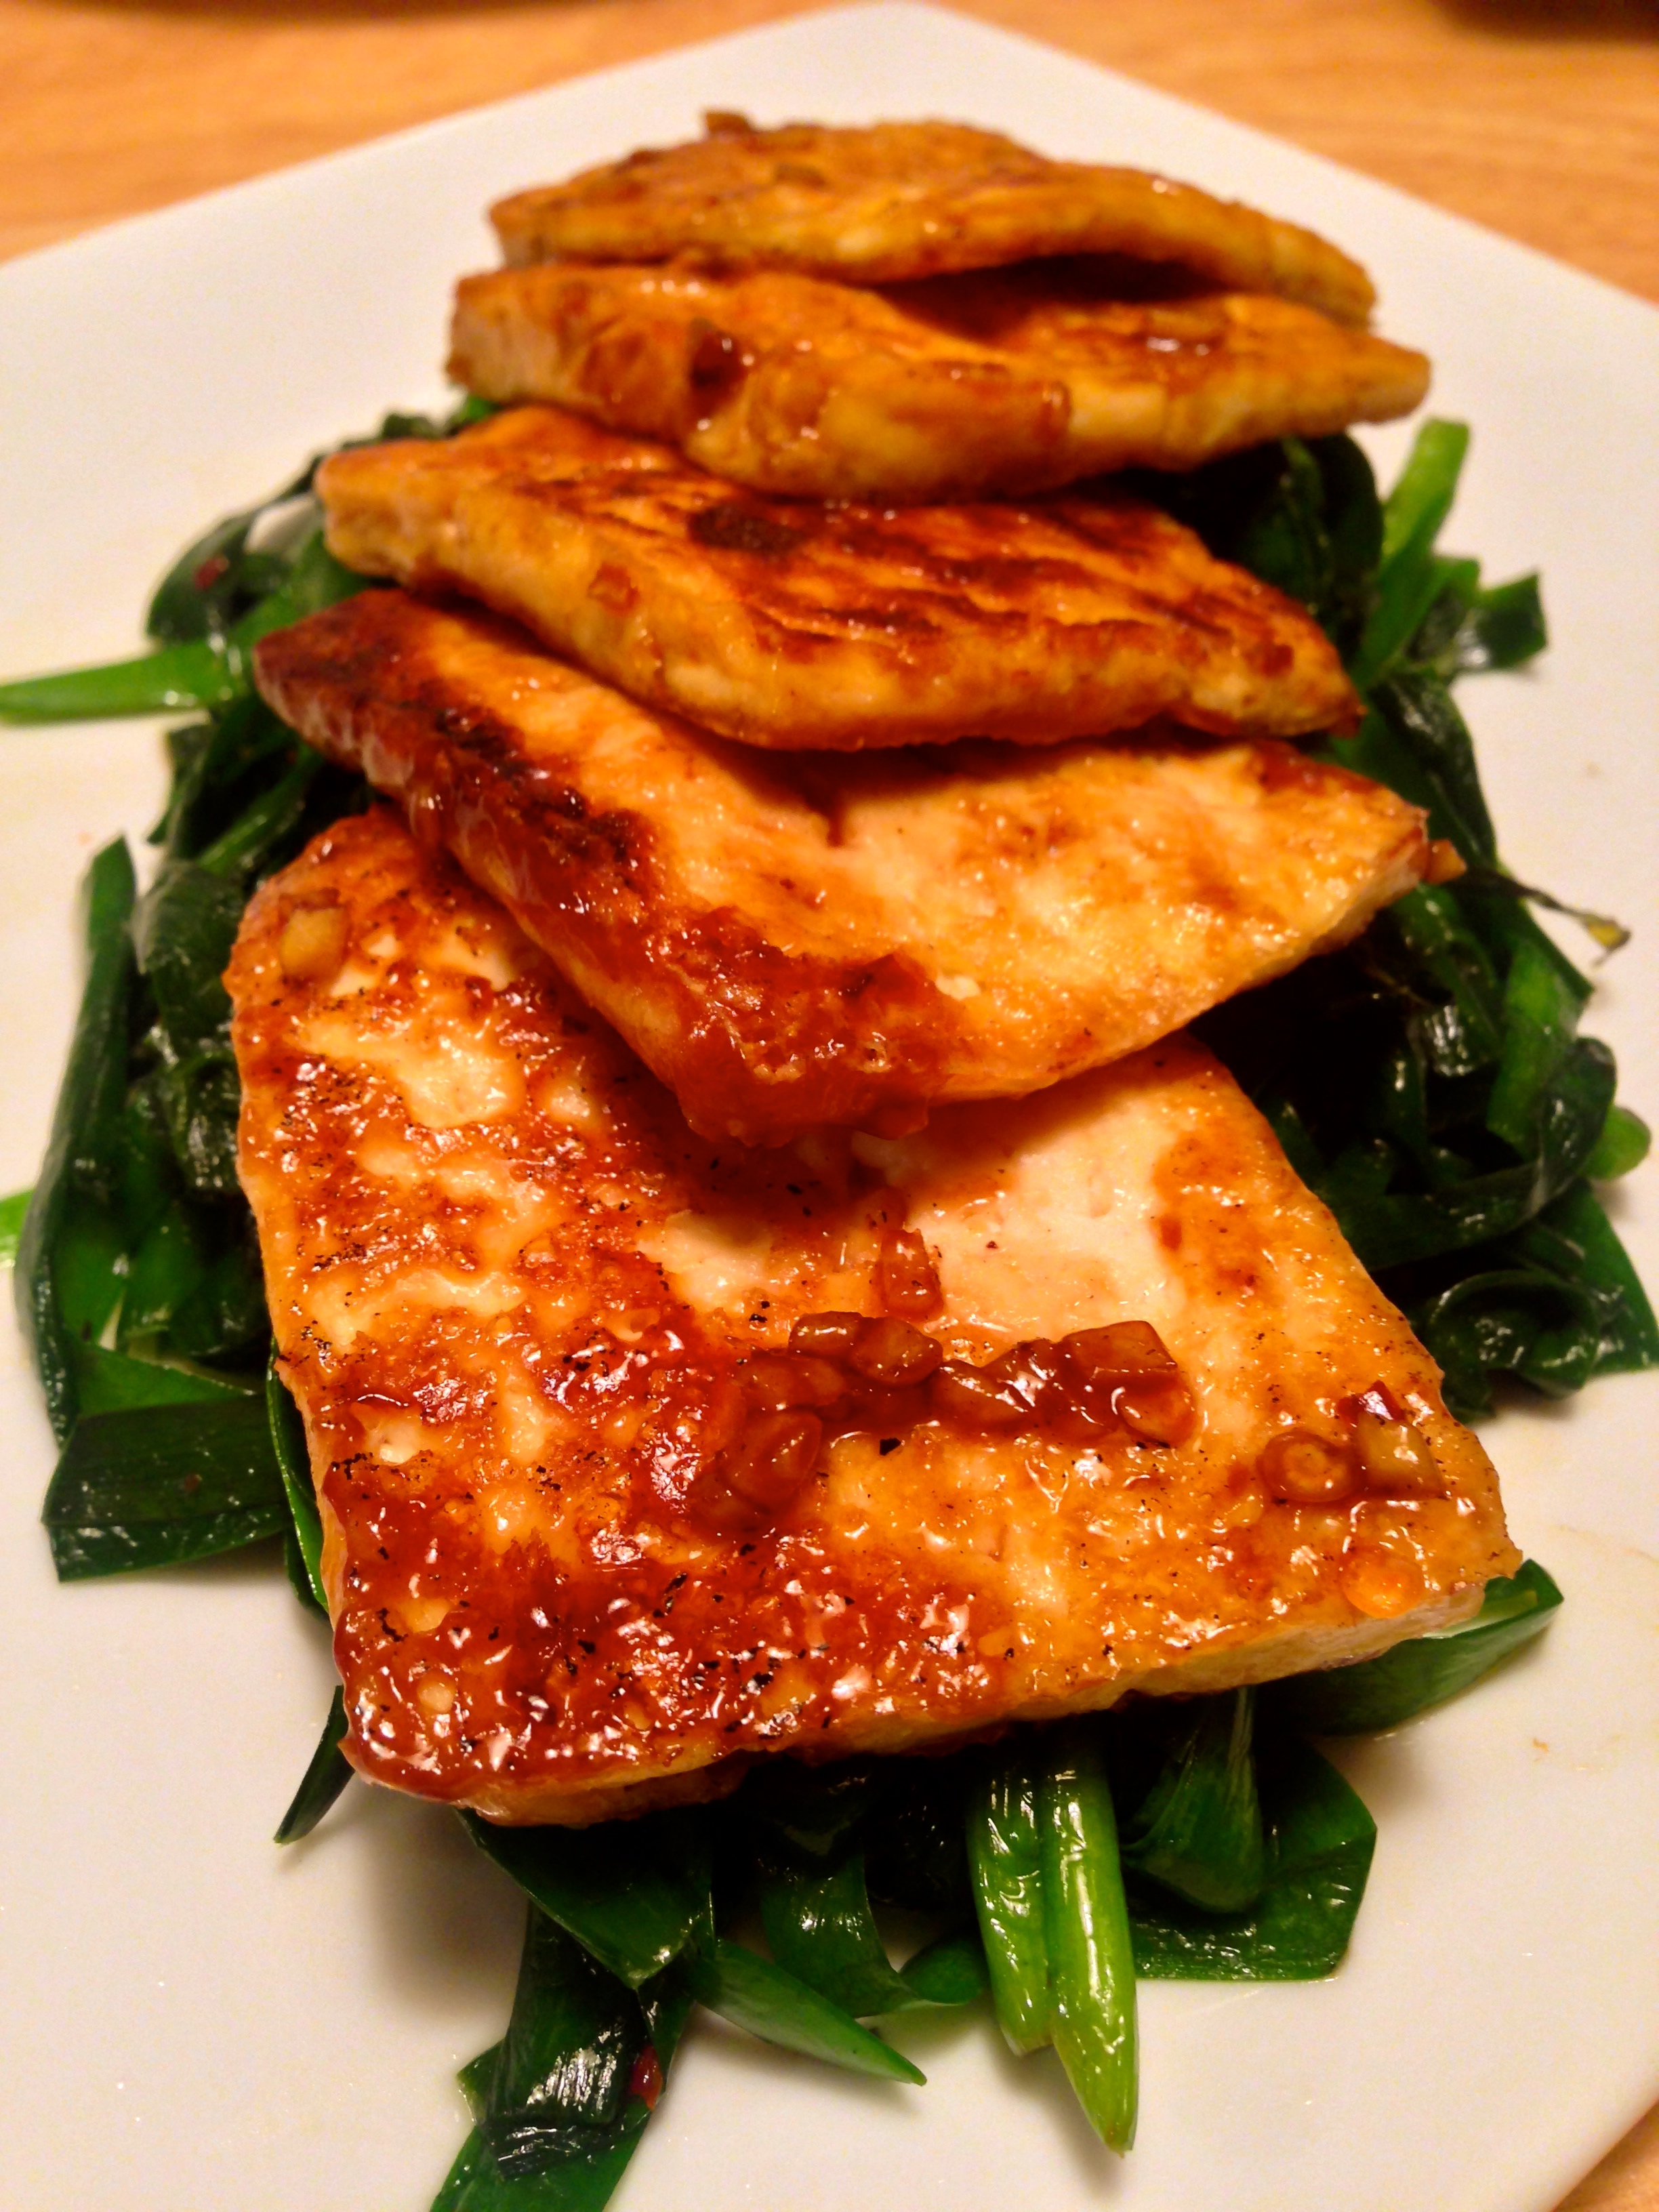
College was my first time away from home and also my first time being truly away from the comfort foods of my mother’s and grandmother’s kitchen.  There were times when I really did not find anything appealing to eat in the dining halls … and since I felt guilty eating out when I already had a meal plan and didn’t really have the funds to be doing so all the time, I had to figure out other ways to adapt.  One of them was by simply steaming tofu with a little soy sauce, scallion, and sesame oil, which were readily available at the very consistent (and boring) salad bar.   J claims to have taught his cousin Nancy this ‘dish,’ but I think anyone with Asian roots would have thought to put these ingredients together instead of eating raw, naked tofu on a pile of lettuce.  Regardless, it was a tasty, easy, and basic combination that tasted of home, evidently for all of us!

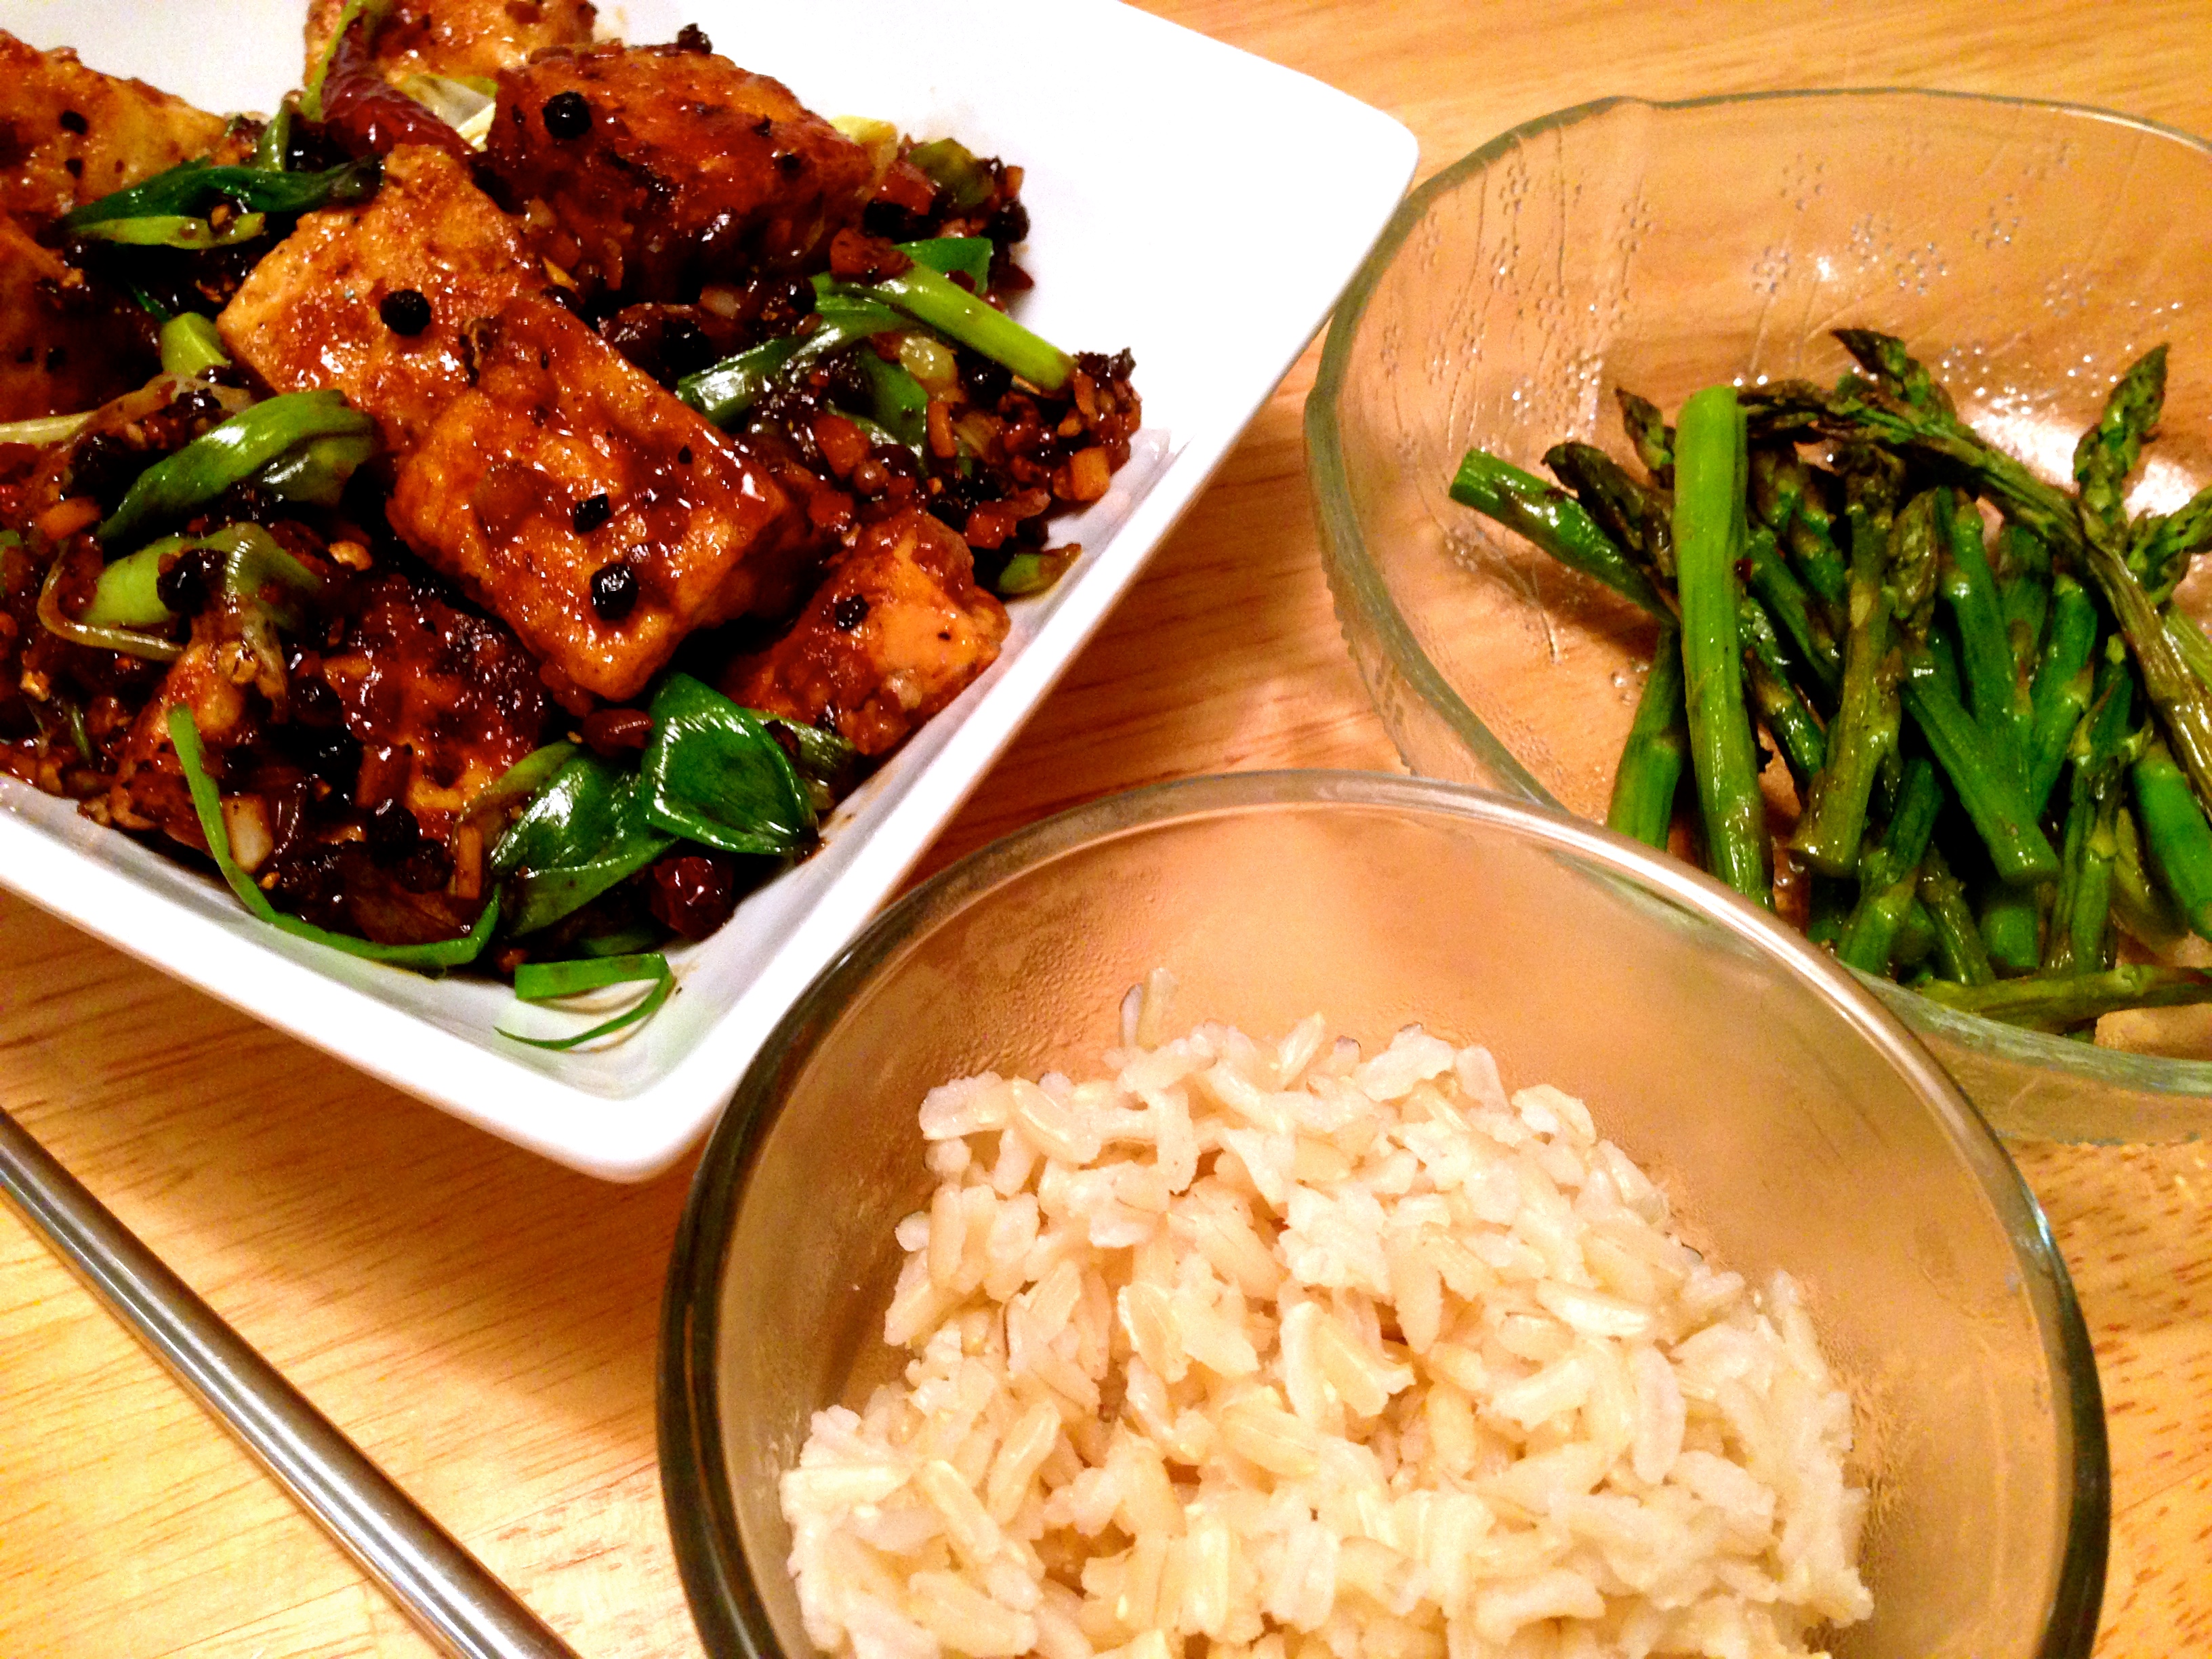
I have since prepared tofu many different ways beyond this basic preparation, and a day like today called for comfort food.  Enter: steamed fragrant jasmine rice, stir-fried seasonal sugar snap peas with ginger and garlic, and this robustly-flavored tofu dish:  Black Pepper Tofu.  A riff on a familiar dish, inspired by none other than Ottolenghi.

I ran across the recipe in BOTH my Ottolenghi cookbook and Food52’s Genius Recipes cookbook, which attests to its flavor and appealing textures.  I had to modify it, though, because 11 tablespoons (150gm) of unsalted butter does not belong in my comfort food repertoire…

IMG_3543

Black Pepper Tofu (serves 2)

Ingredients:

  • ~3 tbl canola or grapeseed oil, divided use
  • ~9.5-10 oz (270 gm) firm tofu (1/2 block)
  • cornstarch, for dusting
  • 3 small shallots, thinly sliced
  • 6 garlic cloves, crushed
  • 1.5 tbl finely chopped fresh ginger
  • 4 fresh mildly spicy chiles, thinly sliced
  • 1.5 tbl dark soy sauce
  • 1.5 tbl low sodium light soy sauce
  • 2 tsp black bean soy sauce
  • 1 tbl sugar, or to taste
  • 1.5-2 tbl coarsely crushed black peppercorn (adjust to taste)
  • 6 scallions, cut into 3 cm (1.25 inch) segments
  • sesame oil, optional
  • Instructions:
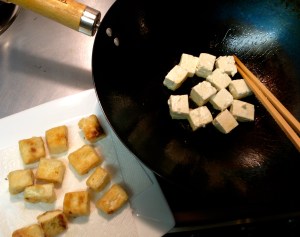
  1. Cut tofu into 1 inch square cubes.  Toss tofu with cornstarch to coat, shaking off excess.
  2. Heat 2 tbl oil into a large well-seasoned wok over medium-high heat.  Add half of the tofu cubes to the oil in a single layer.  Pan-fry, turning them around as you go, until they are golden all over and have a thin crust.  Transfer finished tofu onto paper towels and repeat with second batch.   (You may need to use additional oil for the second batch.)
  3. IMG_3557Drain remaining oil and wipe out the wok.  Add 1 tbl oil to the wok over medium heat.  Add shallots, chiles, garlic, and ginger.  Stir-fry, stirring occasionally until the aromatics become softened and fragrant.  Add soy sauces and sugar and stir, and then add the crushed black pepper.  Adjust seasoning to taste.
  4. Add the tofu to warm it up in the sauce for about 1 min.  Stir in the green onions, and drizzle with a few drops of sesame oil, if using.  Serve hot with steamed rice.

IMG_3542    IMG_3548

Advertisement

Sharing is caring

At least, that’s how my office staff feels, and once a month, our ‘staff spirit’ committee organizes a potluck to bring people together for at least one lunch.  My first office potluck’s theme was “The Last Supper” and everyone was asked to bring dishes that began with their last initial.  It was a fun theme and I brought noodles (japchae) and Nutella Banana Bread.  YUM!

For this last potluck, the theme was Asian food.  I was pressed for time so chose to do something super easy and Americanized, but at least somewhat healthy and hopefully appealing to the masses.  Who doesn’t love chinese chicken salad?  Unfortunately, it is usually laden with fried wontons and syrupy dressing … so I decided to make my own version of Kale Chinese Chicken Salad.  As a heartier green, the kale would remain nice and crisp even an hour or two after I tossed the salad in the dressing – just what I was looking for!

Preparation was made exceedingly easy by a trip to my nearby Whole Foods – after snagging one of their flavorful rotisserie chickens and a bag of their Harvest Sensations Kale Salad mix, I was all set to go!

IMG_3497 kale-salad2

Kale Chinese Chicken Salad (serves 6-8)

  • 1 package of Harvest Sensations kale salad mix (contains kale, shredded carrot, purple cabbage – about 6-8 cups of de-stemmed kale leaves)
  • 1 small 2.5 lb rotisserie chicken, meat shredded
  • 1/4 cup low-sodium soy sauce
  • 2 tablespoons Meyer lemon juice
  • 2 tablespoons Ponzu juice (or just more lemon juice)
  • 2 tablespoons sugar
  • 1 tablespoon rice vinegar
  • 1 teaspoon salt, or to taste
  • 1/2 teaspoon black pepper, or to taste
  • 1 tablespoon toasted sesame oil
  • 1/4 cup grapeseed oil or canola oil
  • 1/2 cup chopped scallions
  • 1/2 cup chopped fresh cilantro
  • 1/2 cup sliced almonds, toasted
  • 2 tablespoons sesame seeds, toasted
  • 15 wonton wrappers, thawed and cut into 1 cm strips
  • vegetable oil spray or mist-o

Instructions:

  1. Preheat oven to 350 degrees F.  Spray wonton strips with a little vegetable oil and distribute evenly in a single layer on a large cookie sheet.  Bake ~6-8 minutes or until golden-brown, stirring half-way through to allow for even crisping.  Set aside.
  2. Whisk together soy sauce, lemon juice, ponzu (if using), sugar, vinegar, salt, and pepper in a small bowl, then add sesame oil and grapeseed/canola oil in a slow stream, whisking until sugar is dissolved and dressing is combined well.  Adjust seasoning to taste.
  3. Toss chicken and scallions with 1/3 cup of dressing in another large bowl.
  4. Toss kale salad mixture with enough remaining dressing to coat, massaging in the dressing.
  5. Add chicken, scallions, cilantro, almonds, and sesame seeds to the kale and toss well.
  6. Just before serving, top with wonton crisps.

Optional additions: blanched snow peas or sugar snap peas, mandarin orange slices (pith removed).

“Not so devilish” noodles

Shirataki noodles are thin, translucent, gelatinous traditional Japanese noodles made from the konjac yam (aka devil’s tongue yam or elephant yam).  They are mostly comprised of glucomannan starch, which is an indigestible fiber.  While very low in carbohydrates and calories and lacking much flavor of their own, shirataki noodles easily pick up the flavors of whatever sauce they are in.  Their slippery texture may be a little unfamiliar to some, but dry roasting them in a non-stick pan can give them more of a pasta-like consistency.

Convenience-wise, shirataki noodles couldn’t be easier – just drain, rinse, and then use!  J. Kenji López-Alt from Serious Eats even has a great recipe for  Sichuan-style shirataki noodle and cucumber salad and sings their praises here.

Shirataki noodles stir-fried with vegetables provided a quick and healthy weeknight dinner.  No need to feel ‘devilishly’ indulgent, here!

IMG_3421Shirataki Noodles with Mushrooms and Sweet Bell Pepper

Ingredients:

  • 7 oz shirataki noodles
  • 4 oyster mushrooms, sliced
  • 4-5 crimini mushrooms, sliced
  • 4-5 baby bell peppers, julienned
  • 3 scallions, sliced into 1 inch segments, white and green parts separated
  • 1/2 tsp black bean soy paste
  • 1/2 tsp sugar
  • 2 tsp low-sodium soy sauce
  • 2 tsp canola oil
  • 1/2 tsp sesame oil
  • 2 cloves garlic, minced
  • 1 tsp sriracha
  • Salt to taste
  • Toasted sesame seeds (optional)

Instructions:

  1. Drain and rinse shirataki noodles.  Set aside.
  2. In a nonstick skillet, heat canola oil over medium-high heat.
  3. Add oyster and crimini mushrooms with a pinch of salt to the pan and stir-fry for 1-2 minutes, until they begin to soften and slightly brown at the edges.  Add minced garlic, soy paste, sugar, and 1 tsp low-sodium soy sauce.  Stir-fry for another 1-2 minutes.
  4. Add bell peppers and the chopped white scallion, stir-frying until crisp tender.
  5. Add drained shirataki noodles to the vegetable mixture, seasoning with remaining 1 tsp low sodium soy sauce, sesame oil, and sriracha.  Toss in chopped green scallion and  stir-fry for another 1-2 minutes to let the flavors meld.   Adjust seasoning.
  6. Garnish with toasted sesame seeds and serve immediately.

Miso…hungry!

Have you ever had days when the hours flash by so quickly that by the time you’ve stopped spinning and finally have the chance to catch your breath, you realize that you’ve been running on fumes and that you are now officially…HANGRY?  Considering that I do not have that many mouths to feed (yet), this worries me a little…how am I going to feed co-dependents not so keen on fumes for sustenance?

All silliness aside, I have slowly been working on my repertoire of quick meals, precisely for these HANGRY times.  It also helps to be less than 10 minutes from a decent grocery store with organic produce.  Even in NYC, I was among the few denizens who did not routinely order delivery, to the consternation of my roommates.

One of the items I always have in my pantry is miso.  Made from fermented soybeans, miso is chock full of protein, vitamins, and minerals and adds a salty, sweet, earthy, and savory dimension to sauces, marinades, and soups.  It lends itself well to both traditional and modern cooking, and is extremely versatile.  I used it to make a quick side dish to pair with my Pan-Seared Sake Sea Bass the other night, and it made one hangry MD much happier after a long day.

IMG_3219 IMG_3218

Miso Butter Glazed Mushrooms

Ingredients:

  • 1 tsp butter
  • 16 oz variety of mushrooms – wiped clean and sliced if larger (e.g. crimini, oyster, shiitake)
  • 2 scallions, thinly sliced with white and green parts divided
  • 1 tbl white (shiro) miso
  • 1/2 tbl water
  • 1 tsp sugar
  • 2 tsp sesame oil

Instructions:

  1. Heat well-seasoned wok over medium heat.
  2. Melt 1 tsp butter and stir-fry white scallion parts and mushrooms, allowing some time between stirs for the mushrooms to get some color.
  3. Combine miso, water, and sugar.  Add to mushroom and white scallion mixture, tossing to coat.  Sauce will thicken slightly.
  4. Drizzle with 1-2 tsp sesame oil, toss in sliced green scallions, and remove from heat.  Serve immediately.

IMG_3239

Pan-Seared Sake Sea Bass with Ginger and Scallions (serves 2)

Ingredients:

  • 8 oz sea bass filet
  • 2 tbl canola oil
  • Kosher salt
  • Pepper
  • 3 1/4-inch slices of ginger
  • 1 clove garlic, smashed
  • ~2.5-3 tbl sake
  • 1/2 inch piece of ginger, julienned
  • 2 scallions, sliced thinly on diagonal, green parts only
Instructions:
  1. Bring sea bass to room temperature by leaving out on the counter for at least 10 minutes prior to cooking.  Season liberally with kosher salt and pepper.
  2. Heat a heavy skillet over medium high heat.  Add oil and heat, adding smashed garlic clove and slices of ginger to infuse the oil while it is heating.
  3. Once the ginger and garlic are fragrant, sear fish, skin side down, about 6 minutes, or until skin is golden and fish is 3/4 cooked.  Baste a few times with oil in the pan.
  4. Lower heat slightly to medium, turn fish over and cook 2 minutes more, until just cooked through.  Transfer to heated plate and keep warm.
  5. Remove ginger and garlic used to infuse the oil, add julienned ginger to remaining oil and lower heat while ginger cooks for ~10-15 seconds.
  6. Deglaze the pan with sake, scraping up browned bits.  Remove pan from heat, add scallions and stir to wilt slightly.  Spoon scallion and ginger mixture over the sea bass and serve immediately.

Lemon Roasted Asparagus

Ingredients:

  • 1/2 bunch asparagus
  • olive oil
  • lemon zest
  • kosher salt
  • freshly ground pepper

Instructions:

  1. Preheat oven to 375 degrees F.
  2. Wash asparagus and trim tough ends.  Pat completely dry.
  3. Toss with just enough olive oil to coat.
  4. Season with salt and pepper to taste.  Grate fresh lemon zest over to taste.
  5. Roast until crisp-tender, ~10-15 minutes.

Happy New Year!

IMG_3030 Cung chuc tan xuan!  Xin nian kuai le! Growing up, I took for granted that we would always celebrate Lunar New Year by going over to our grandparents’ house, where my grandfather would put on his traditional blue robes and gift us with lucky red envelopes after we had wished him “prosperity, happiness, and more than 100 years of long life.”  He never seemed to mind hearing that over and over ;).  I did not realize then how much I had internalized or how much I would miss the traditions my parents sought to pass on to us, even as they lamented how U.S. celebrations paled in comparison to their memories.  I used to dress up with my friends in grade school and give our classmates a mini-presentation on Lunar New Year traditions and foods.  I should have had an inkling then of how much I had absorbed.

My first lunar new year away from my family was buffered by being in Boston, where there was a vibrant Asian community and college student groups got together to share the holiday.

In medical school, however, I had a taste of the disappointment my parents likely felt the first time they celebrated after leaving their homeland.  While I was excited by the holiday and its associations with spring (in California, anyway), my classmates were surrounded by snow piled several feet high and oblivious to why they should think about wearing red or eating noodles, sticky rice cakes, or dumplings.  So…I took matters into my own hands, and decided that I would cook as much as I could on my own.  I spent an entire day making nian gaoluo bo gaojiao zi, abalone, fish, noodles, chinese broccoliand cha gio.  It was a little crazy, but the best form of procrastination I could have wished for, and brought the holiday spirit even all the way out to the snowy tundra.

J loves dumplings so much that he has a bottomless stomach for them, so we made a batch a little while ago.  It seemed appropriate to make some today, and perhaps to share our recipe version.  As with many home recipes, quantities are more like guidelines and should be adjusted to personal preference.

Pork, shrimp, and leek dumplings (makes ~90)

Ingredients:

3 packages of round dumpling skins (about 3o per pack)
1 lb ground pork (not too lean)
1/2 lb shrimp, shelled, deveined, and finely minced
1/2 bunch of chinese chives, finely minced (about 3 cups chopped)
~1/2 napa cabbage, finely chopped (about 4 cups chopped)
~1-2 tsp grated ginger (optional)
kosher salt, divided use
freshly ground pepper
~1 tbl oyster sauce
~2 tbl soy sauce
~1 tbl Shaoxing wine
~1 tbl sesame oil
~1 tsp sugar
small bowl of water (for sealing the wrappers)
canola oil (for cooking)

Instructions:

  1. Lightly salt chopped cabbage and set aside for about 15 minutes at room temperature.  Squeeze cabbage in a cheesecloth, clean dish towel, or your hands to drain excess water.
  2. Combine pork, shrimp, napa cabbage, chives, and ginger in a large mixing bowl.  Season with oyster sauce, soy sauce, Shaoxing wine, sesame oil, and sugar, using hands if necessary to mix very well.  Check seasoning by cooking a small dollop of the mixture in a skillet over medium heat.  Adjust with further salt, sugar, and pepper to taste.
  3. Working with one wrapper at a time in the palm of your hand, spoon ~1 tbl of the filling onto the center of the wrapper.  Moisten the outer edge of one side of the wrapper with your index finger.  Fold one edge over and pleat – you can start from one end and pleat to the other, or pinch the middle together first and pleat from the middle to the end, one side at a time.  Be sure to press pleats tightly to seal. *
  4. To cook, you will need to cook in batches since they can only be cooked one layer at a time.  Heat 1-2 tbl canola oil in a nonstick pan (ceramic, cephalon, etc) over medium high heat.  Place the dumplings in one layer (flat side down) into the pan.  They should sizzle!  Let the dumplings cook about 2-4 minutes so that the bottoms become golden brown.  Add enough water so that there is about 1/4 inch of water in the pan, cover, and reduce heat to medium.  Cook for another 5-7 minutes, or until the water evaporates and you again hear the sizzling.
  5. Serve hot, with soy sauce, which can be mixed with black vinegar, sesame oil, hot chili sauce, chopped ginger, garlic, and/or scallions.

IMG_3027 IMG_3029

*if freezing, place dumplings in single layer on a tray and freeze the entire tray until the dumplings are frozen. Then remove them and pile them individually into a freezer bag.

Longing for spring…ramps.

When I lived in New York, I lived only a few blocks away from the green market.  As a transplant from California and homesick for the amazing produce, I reveled in the bounty of summer and fall, when the market was laden with seasonal fruits and vegetables.  By winter, the market’s colors waned as the leaves in Central Park also disappeared.  But as soon as the first glimmers of spring came, I saw stirrings of the glorious greens to come.

It was at the green market that I first discovered ramps.  RAMPS!  I’m not sure exactly how my obsession began, but from the first time I brought these somewhat pricey alliums home, I could not get enough of them.  I made ramps with soft scrambled eggs, ramp pizza, ramp risotto, and ramp pesto.  Perhaps my obsession stemmed from knowing that their arrival meant the coming of warmth back to the City and the Park, which would regain the beautiful lush green that I enjoyed on my runs.

Back in California, I brought home a bunch of chinese chives* the other day to make dumplings.  With a large portion of the bunch remaining, I decided to pay homage to the versatility of this other member of the allium family.  They are wonderful paired simply with softly scrambled eggs, but I chose to make a simple soup with chives and tofu, and stir-fried them to accompany pan-seared tofu.  Chinese chives and tofu two ways.  Not quite ramps, but still delicious and evocative of meals from my mother’s kitchen.

IMG_3131Stir-Fried Chinese Chives with Glazed Tofu

Ingredients

2/3 block of organic tofu (10-12 oz), sliced

4 tsp canola or safflower oil, divided use

3/4 lb chinese chives, cut into 3 inch segments (about 3-4 cups)

1 tsp red chili flakes (or to taste)

1/4 tsp salt, or to taste

1.5 tsp ginger, minced

1/2 tsp sesame oil

1 tbl oyster sauce

Instructions:

  1. Heat a well-seasoned wok over high heat
  2. Add 2 tsp canola oil, swirling to coat wok evenly, and heat until hot.
  3. Add chives and red pepper flakes and stir-fry, letting chives rest on bottom and sides of wok several seconds between stirs, until chives are tender and slightly browned, 2 to 4 minutes.
  4. Season with salt to taste.  Set aside and keep warm.
  5. Wipe out wok and heat over medium-high heat.
  6. Add remaining 2 tsp canola oil and pan sear tofu slices on both sides until golden, about 3-5 minutes each side.  Set aside.
  7. Add 1/2 tsp sesame oil and swirl to coat bottom of the pan.  Add minced ginger and stir until fragrant, about 1 minute.  Add in oyster sauce, turn off heat, and return tofu slices to the pan, turning gently to glaze.
  8. Top stir-fried chives with the pan-glazed tofu and serve immediately.IMG_3123

* Apparently, raw chinese chives have quite the pungent odor, unlike their cousins the ramps.  It was their ‘fragrance’ that led J’s friend Bao, who is no stranger to the likes of fish sauce, kimchi, durian, and other pungent Asian foods and condiments, to comment on how my kitchen smelled like a ‘proper Asian home.’  If that is synonymous with “Asian supermarket,” I’m not sure that’s a good thing.  :-/

Packing in the veggies!

When I was studying in the Midwest, I used to crave the foods I had no hope of finding anywhere nearby: jiao zi, luo bo gao, dolsot bibimbap, kimchi, pho, banh xeo, bun rieu, Vietnamese cha gio…the list went on and on.  The homesickness for the diversity of Asian cuisine drove me to the kitchen, where I tried to recreate the tastes from memory and by researching the internet or cookbooks.  Some people received care packages with sweets and treats; my mother shipped me Asian ingredients and sent me back to school with suitcases stuffed with gai lan, which was not readily available where I was living.

I still love buying and preparing Asian vegetables, which shine in the simplest of preparations.  Living in a part of the country with amazing produce also helps.  Inspiration is always around the corner at the next farmer’s market!

I made this simple miso-glazed broiled eggplant the other night for a light dinner, and couldn’t wait until the next day to have the leftovers for lunch.  Enjoy!

Miso-glazed eggplant
IMG_3046

Ingredients:

  • 1 tbl mirin
  • 1 tbl sake
  • 2 tbl shiro miso
  • 2 tbl sugar
  • 1 tsp grated fresh ginger
  • 2 Japanese eggplants, halved lengthwise
  • 1/2 tsp sesame oil
  • toasted sesame seeds (garnish)
  • green onions sliced on the bias (garnish)

Directions:

  • Preheat the oven to 425°F.
  • Place the mirin, sake, and sugar in a small saucepan and bring to a simmer over medium heat.  Add miso and ginger and stir until smooth.  Reduce heat to low and continue to cook, stirring occasionally, while you prepare the eggplants.
  • Score the cut sides of the eggplant with diagonal cuts.  Brush the cut sides of the eggplants with sesame oil. Put the eggplants cut-side down on a baking sheet and roast  in the oven for about 15-20 minutes until they just start to shrivel. The flesh should be fork tender. Remove from the oven and carefully turn them over.
  • Brush the top of the eggplants with a good layer of the miso sauce (use up all the sauce!) and put them under the broiler until the sauce bubbles up and starts to caramelize, about 1-2 minutes. Remove from heat, garnish with toasted sesame seeds and green onions, and enjoy!

Adding a little spice to the workweek

Between clinical work and finishing up clinical and research work in the evening once I leave the office, it often feels like the days are too short by the time I’ve managed to exercise and do a few chores or run errands.  That said, there is *always* time to be inspired to cook, using new and old recipes.  Even more so when there’s company for dinner!

Tonight, I planned ahead and prepared mae-un dak gui, or Korean chili paste spicy chicken.  I served it with stir-fried green beans, bok choy with ginger, mushrooms sautéed in miso butter, and brown rice.  Total comfort food, and a wonderful way to break in the new grill pan I received for Christmas!

The chicken itself needs to marinate at least 8 hrs (preferably overnight) – it is simple to throw together the night before or early in the morning before work, which is exactly what I did.  With flash-stir-fried veggies, it makes for a quick weeknight dinner!

IMG_3063

Korean Chili Paste Spicy Chicken (mae-un dak gui, adapted from original recipe here):

Ingredients:

1-1.5 lbs boneless, skinless chicken thighs
2 tablespoons Korean chili pepper paste (gochujang)
1 tablespoon soy sauce
1 tablespoon water
3 tablespoons white sugar
1 tablespoons mirin (or sake)
1/4 cup onion, pureed
1 1/2 tablespoons grated or finely minced ginger
1 tablespoons minced garlic
2 scallions, chopped into 1 inch segments, white and green parts separated

Directions:
1. In a large bowl, mix the gochujang, soy sauce, water, white sugar, mirin, onion, ginger and garlic together. Make sure that the sugar is well incorporated in the marinade.
2. Add chicken to the marinade and mix well, making sure each chicken piece is thoroughly coated and has marinade incorporated into all the nooks and crannies. (Wearing disposable kitchen gloves would be helpful for this if you have them.)
3. Cover and marinate for at least 8 hrs or overnight.
4. When ready to cook, heat the grill pan over medium heat. Cook for about 7-9 minutes on one side over lower heat, as the higher sugar content of the marinade lends itself to burning. Do not move for the first few minutes to allow for searing and caramelization of the meat. Add chopped white scallion parts. Turn chicken and cook an additional 7-9 minutes on the other side, adding chopped green scallion parts about 1-2 minutes prior to removing the grill pan from the heat, just long enough to wilt slightly.